recent posts

Thursday, January 23, 2014

63 The Counter Top Question: Granite, Quartz, or (Say What?!) Porcelain?

Well, it's day 13 of the big remodel, and my house is covered in a layer of concrete dust.


Because the bathrooms-to-be look like this (keep in mind these photos are taken in the dark, the bathrooms have no electricity in them right now):


Yes, there has be a whole-lotta jackhammerin' going on at my house. This is what happens when you want to make one toilet into two. Well first your plumber grunts and groans and tries to talk you out of it but eventually succumbs to your reasoning, and then this happens.

While the plumbers have been destroying the air quailty in my house, I have been running around town trying to find just the right everything. Right now I'm trying to decide what to do about kitchen counter tops.
I have had granite before; this is a picture of the kitchen in my last house:


And the house before that was quartz, and the house before that was laminate. And this house right now is (yuck!) tile. So I've lived with them all.

From the get-go, I've been thinking that I would use two different types of counter materials: Quartz on the outer counters, and Granite on the island. 

So I headed out on the town and pretty quickly found Quartz that would work on the three counters (a medium to dark brownish gray). A color I really like is Hanstone's Tiffany Gray. It can be seen in this picture from Houzz:

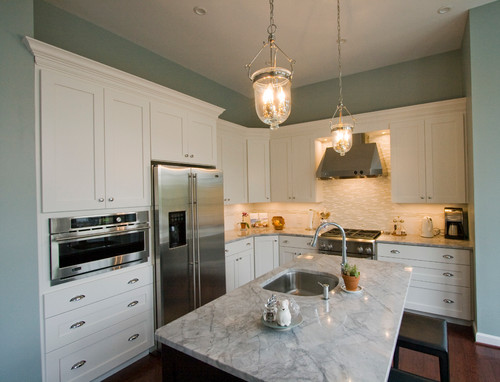
So, then I started looking for Granite. In my head the granite I want is very white. It would be marble if marble wasn't so difficult. While browsing on Houzz, I discovered the perfect granite which really isn't granite, it's apparently Quartzite. It has lots of names, one is "White Fantasy" or "Super White", and it looks just like marble but isn't high maintenance and stain-able like marble. Here is another picture from Houzz with this quartzite counter:


Gorgeous, right? But super elusive. I've been all over town looking for this, and it's like the Loch Ness Monster or Bigfoot. People are claiming to have seen it but no one has proof. I think there may be a counter top conspiracy out there to frustrate me: "Look, she's coming! Hide all of the White Fantasy!".

The only Brazilian Quartzite I've seen looks like this:


It's hard to tell, but it has a lot of brown and cream tones. And of course, it's all the most expensive class of granite, "Exotic".

So as I was getting ready to leave the granite supply place, she asked me what style I was looking for. I explained to her my dilemma and she pulled out some samples of something "brand new" that "no one else in San Antonio has yet". Well, of course, my ears perked, what could this be? What did you say again, Porcelain counter tops? Like what the toilets are made out of? She pulled out some samples, and they were gorgeous! They actually had a slab of it on the floor:


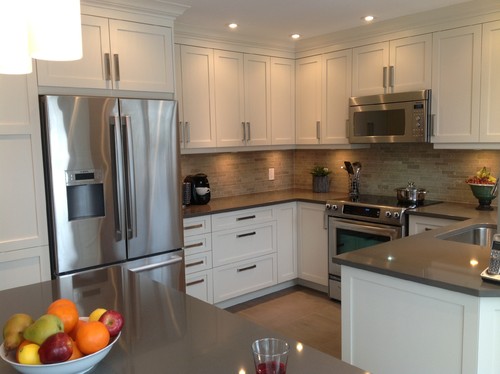
This was in one of the colors I'm looking at, called "cement". The most beautiful thing is, it all has a honed look, it's not glossy like Quartz or Granite usually is. It has a matte finish. And from what the brochures say, it is more durable then Quartz or Granite. This is what it looks like in a kitchen:


And best part is, it is supposed to be cheaper than Quartz, and some Granite. I am going to get it priced out, and I'll let you know. The mesh backing said that is manufactured in Spain (eeeek!). I love Spain! Maybe this was meant to be!


The product is called Neolith, and apparently it's super popular in Europe. It is just making its way to the United States, and is starting to get used. It comes in a whole range of colors, some solid some patterned. I am super excited about the possibilities! I am thinking of doing the whole kitchen in Porcelain, or maybe a Porcelain/Quartz combo. White Fantasy can stay just that, a fantasy--I want Porcelain! Or as the Spaniards say, "Quiero Porcelana!"
jennifer


Friday, January 17, 2014

16 Envy Green Campaign Dresser


I’m late to the campaign furniture party, I know it. I was recently reading an article in Better Homes and Gardens that featured a blogger named Joy, and she had these campaign chests in her baby’s nursery:


When I saw them I think I heard angels singing. I became obsessed with searching for campaign furniture because I HAD TO HAVE A CAMPAIGN DRESSER.  The more I looked at Pinterest and blogs, the more I realized other people had already discovered this wondrous campaign style, and so finding what I wanted became very illusive.  Until one day, thanks to the wonderful world of Craigslist, I found what I wanted. Unfortunately it was in Mesa, Arizona, about 4 miles from my old house. Drat! What is a girl to do? Call her Daddy and Mommy, that’s what. And, being the very supportive parents that they are, raced to the store and bought it for me. So after Thanksgiving break when we visited the parents, I brought home some very precious cargo:


OK, my kids are precious too, but I may have left one or two of them behind if this didn’t fit in my car. Luckily it all worked out, even if it was a tight fit for the 14 hour trip back home.


When I got it out of the car and got a good look at it, I realized it needed a little love. Well I had enough love for this thing to go around, so that wasn’t going to be a problem! The previous owner was very misguided in campaign furniture, because he or she painted over the beautiful brass trim. Yikes! So first things first, I pried all of that trim off of the dresser.

And I boiled it, in a pot I bought for this very purpose at Goodwill. I threw in some baking soda and lime juice, and sure enough, the paint just melted off of the brass.

I knew this dresser was going to serve as a TV stand in my room, so I needed to build a small hutch to place the TV on so it would sit a little higher. I saw pictures of dressers and hutches online, like this one...
So I knew what the hutch should look like. I measured the top of the dresser and then cut a 1 x 10 board the exact same length.


I also cut two pieces 10" tall for the sides, a piece for the back, and a 1 x 2 for the front of the hutch.


I attached it all together with wood glue and pocket hole screws.


I put it on top of the dresser for a test run, and it was a perfect fit!


I primed the hutch, and sanded the hutch really well. I also filled all the holes, divots, and splits in the dresser body and drawer fronts with wood putty, and then gave the whole thing a really good sanding.


And now it was ready to paint! I was super excited about using my paint sprayer that I used on my four poster bed, but I wasn't excited about doing it outside. The combination of the breezy weather and bugs that were bound and determined to commit suicide in my paint job made it tough. If only I had a paint tent. That's the beauty of the internet, of course someone has made a super easy collapsible spray paint tent! I found a tutorial for one here.


So a bit of PVC pipe, and some cheap tarps....


And a paint tent is born! Right in the middle of my super packed garage!


I gave all of the pieces a good vacuuming and wipe down, and into the tent they went.


The tent I made was 8' x 8', so it was the perfect size to fit both pieces (the dresser and hutch) in at once.


I put the dresser up on blocks and the hutch up on a table so I could easily get to each part. I pulled the drawers out just slightly and sprayed them sitting in the dresser. And then I put on my best shower cap and painting clothes, all the way down to my husband's tube socks (and important--respirator!!) and hopped in the tent. By showing you this picture, it is obvious I have no pride. None at all.


And it worked perfectly, pride be darned!


The finish was gorgeous. I kicked it up a notch in the paint quality department used Sherwin Williams  Duration Interior Acrylic Latex in a satin finish. And the color really is "Envy". I wanted to see if I could get away without using a clear coat on top, so I picked a good paint in a good finish, and I am really happy with the results.

The beautiful hardware turned out to be very hard to clean. I tried all sorts of methods, including Brasso, but nothing would get the tarnish off of the hardware. So I turned to my husband, who's career as a Dentist makes him particularly good at polishing things. He got out the Dremel and got to work.


I harassed my teenage son and his friends to help me get the dresser up to my room. I may have bribed them with powdered donuts.

I used my drill and a 2 1/8" hole bit to put a hole in the back of the hutch for cords and cables.


I attached the hutch to the back of the dresser with flat brackets, one on each end of the dresser.


Then it was time to put the polished brass back on the dresser, one piece at a time.


I added some brass corner pieces I found on eBay to the hutch, and put the TV, DVD, and cable box under the hutch.


I added a few things to the top of the dresser, and some pictures above the TV, and I am really excited how it turned out:


Here are a few more detailed shots of my new campaign dresser/TV hutch:


If you find a book in a thrift store that has your name as the title, and the text is in French, buy it. You may need to put it in your room.


This is the happy view I have of the TV from my bed...and an even happier view of the piece of furniture holding the TV:


I added a couple pictures above the TV. They are pictures of Spain and Italy that we took when we went to Europe for our 5th anniversary, many anniversaries ago. They are still our favorites.


I used some gold glittery scrapbook paper and made my own photo corners to the pictures.


I can finally put my campaign obsession to rest, with my new campaign dresser all settled in it's new home. Now I just have to find the next thing I can't live without!

jennifer
This post is linked to Miss Mustard Seed and Remodelaholic and Tatertots and Jello.